10 Ways to Reset Your Kitchen for the New Year!

image1

1. Scour your pots and pans.

Yes, I’m actually telling you to scrub your dishes when you haven’t cooked anything in them — and we’re talking the kind of work that requires elbow grease. Even when well-washed with dish soap, frequently used stainless pots and pans get patches — especially along the sides, edges, and exteriors, where cooked on fats tend to stubbornly cling.

Steel wool can scratch, so instead pick up a non-abrasive sponge and a mildly abrasive product or baking soda, and get in there for a thorough scrub.

2. Clean or change your stove vent fan filter.

Whether you have a fancy range hood or the classic apartment vent fan that blows exhaust directly into your face, it could use a fresh start. The good news is that a fresh start requires little more than a kettle of hot water, a dish brush, and some soap. If you don’t remember the last time the filter was changed, it’s probably worth picking up a new one at your local hardware store or online. Check your owner’s manual. If you’re in a rental and there’s no manual to be found, look up into the range hood; there’s likely a sticker to tell you the serial number of the filter you’ll need.


3. Clean your oven.

Whether sputtering grease from a Christmas goose, overflowing pie filling, or bubbling green bean casserole, there is likely something spilled onto the floor of your oven right now. You can, if your oven has this option, run the oven cleaning cycle or use a combination method that pairs a solvent and some scrubbing. Pick up some all-natural grill and oven cleaner, baking soda and vinegar, or — in really tough cases — ammonia.


image2

4. Treat your wooden tools.

Think of this as massage time for some of your most beautiful and beloved kitchen workhorses: your wooden spoons, cutting boards, and wooden-handled knives. Wash them by hand and towel dry them thoroughly; then apply mineral oil or, in dire cases, equal parts mineral oil and food-grade beeswax, melted together and allowed to cool until thickened. Rub either into the edges of your boards and tools and allow them to sit overnight. Buff any excess oil or balm away with a fresh towel the next day and your tools will be glossy, smooth, and ready for anything.


5. Deal with your drawers & edit your tool collection.

The drawers closest to the kitchen counter tend to catch crumbs, and pulling everything out to clean them is a great chance to assess your kitchen tools. Before you return things to the drawer, be honest with yourself about the last time you used them.

Chances are that the pastry blender, julienne peeler, candy thermometer, and cherry pitter probably don’t need to be in your most easily accessible storage space. There’s nothing wrong with storing these occasionally used tools elsewhere — even out of the kitchen. Garlic press you never use? Duplicates of anything? Donate them. Your drawers will be less cluttered and your tools will be more of a pleasure to use.


6. Change your water filter.

The first week of the year is a great one for updating things that need to be done periodically, like replacing the filter in your water pitcher, and giving the pitcher itself a thorough wash. Recycle the old filter, get a new one going, and set a reminder on your calendar to do it again in three months.


7. Clean or replace dishwashing tools.

Freshen your scrub brush with a trip through the dishwasher, or soak the bristle end in distilled white vinegar for an hour or two and then hang to dry. While you’re at it, boil your dish rags and then wash and dry them as usual. If you’re still on team sponge, this is not the time to microwave. Get a fresh one and resolve to squeeze it dry after each use. No matter what kind of dishwashing tools you use, assess them honestly and replace them if it’s time. Having a clean slate is a great incentive to keep things nice beyond January.

image3


8. Clean your dishwasher.

If you’ve got a dishwasher in your life, it likely saved you from hand-washing countless plates after parties this holiday season. If so, you owe it some spa time. Deep cleaning your dishwasher isn’t even an arduous task: Clean the filter, give forgotten spots a good wipe-down, and run a cycle with some vinegar.


9. Clean your garbage disposal & microwave.

What’s the best way to clean your microwave? With a lemon, some water, and a dishtowel. What’s the best way to clean your garbage disposal? With a lemon, a few ice cubes, and a handful of salt. Get the most out of that lemon by completing these two tasks in succession for a kitchen reset you can cross off the list on a weeknight.


image4


10. Deep clean your refrigerator & freezer.

Perhaps not the project to take on after a long day — this is a tedious one with a big payoff. It’s time to tackle your refrigerator: Pull everything out of it, stowing any truly temperature-sensitive items like meat or dairy into a cooler. Throw away or compost tired leftovers; condiments; and forgotten half-empty jars of jam, pickles, or anything else you won’t actually eat. Be ruthless. Then follow our guide to truly clean your refrigerator. Repeat this process with your freezer. Treat yourself to fresh boxes of baking soda to keep in the doors of each to absorb aromas.

Got a holiday kitchen disaster? We’ve got a fix for that!

disaster

If you’re planning to entertain at home this holiday season, you’d be wise to bear in mind the words of Julia Child: “Never apologize. Never explain.”

Because something is going to go wrong. Something always does. But that doesn’t mean you need to tell the world. Her philosophy was simple. Embrace the disaster, do what you can to fix it, but tell nobody. Just serve it as is and chances are good no one will notice or care. Did your souffle fall? Call it a pudding cake instead. Are your cookies overcooked? Crumble them over ice cream.

Which is to say, there’s almost no kitchen mistake that can’t be fixed so long as you stay calm and keep an open mind. In fact, as far as I know there are only two things that are unfixable. We’ll come back to those, but in the meantime, let’s talk about some of the most common holiday cooking problems and the best ways to fix them.

The turkey isn’t done. So your guests arrived two hours ago, but the turkey has barely broken 125 degrees F. Now what? Maybe it’s time to check the movie listings? Just kidding. Sort of. This is a hard fix, but it’s not impossible. Start by making sure you are getting an accurate read on the turkey’s temperature. Use an instant thermometer inserted at the leg/thigh joint, and make sure the probe doesn’t hit bone.

Next, pull the bird from the oven and increase the temperature by 50 degrees F. Cover the turkey with foil, then return it to the oven. Check the temperature every 30 minutes, but no more than that. More frequent opening of the oven lets the heat escape, further slowing the cooking. Once you are within striking range of your target temperature (155 degrees F to 160 degrees F), remove the foil to allow for browning (unless the bird already was sufficiently golden).

In the meantime, if you are so inclined, distract your guests with an easy snack and cocktail. Plan ahead and stash some bacon and wheat crackers, as well as apple cider, bourbon and oranges. Quickly wrap half a slice of bacon around each cracker, sprinkle with pepper, then arrange on a baking sheet and bake (whatever temperature the oven is already at is fine) until the bacon just barely crisp. For the drink, spike cider with bourbon and an orange slice. Nobody will notice the delay.

How to avoid this next time? Plan better. For example, if it is recommended that you roast your 16-pound turkey at 325 degrees F for 3-1/2 to 4-1/2 hours, assume it’ll take the longer estimate. But even so, start checking the internal temperature on the early side, after about 3 hours. If the turkey’s not done, keep checking at 30-minute increments until it registers about 160 F. (Remember, the temperature will continue to rise to the needed 165 F while the bird rests).

The turkey is done too soon. If your turkey gets to 160 degrees F and your guests have not arrived yet, don’t fret. The turkey needs to rest, covered loosely with foil, before carving, for at least 20 minutes. And it will stay rip-roaring hot for up to an hour.

The turkey is dry. Turkey tends to be flavorless enough as it is, never mind when it is overcooked and dried out. To fix a dry bird, heat the oven to 300 degrees F. Carve the meat off the bird, slicing it as you would to serve. Arrange the slices, slightly overlapping, in a shallow baking pan, then pour some turkey or chicken broth over them, enough to come halfway up the sides of the slices of turkey. Cover the pan tightly with foil and heat the turkey for 10 minutes, or until it’s heated through.

Now lift out the slices and arrange on a serving platter. Ladle gravy over the slices. It will be a beautiful presentation and the meat will be deliciously moist.

The turkey isn’t carving nicely. Sometimes when you carve the bird, much of the breast meat remains on the bone. There is a reason this happens; it’s the wishbone, which blocks the knife from slicing all the way done to the rib cage. So get the wishbone out of there, then get back to carving. And the best way to carve is to start by cutting the whole breast off the carcass, removing one half-breast at a time. Then do your slicing.

Also, unless you’re a professional chef or a surgeon, I suggest carving the bird in the kitchen (where there are no spectators).

The beef or pork is overcooked (or cold). This one is easy. Start by heating some of whatever gravy you have on hand. If it appears there might not be enough, stretch it by adding a little beef or chicken broth (or, in a pinch, water). Slice the meat thin, arrange it in overlapping slices on the serving plates (do all of this out of view in the kitchen), then pour a liberal helping of hot gravy on every serving.

The sauce looks greasy. This is because the fat and other liquids are starting to separate. Just return the sauce to the pot over low heat and whisk in a little water. It should become emulsified and smooth again in no time.

The gravy is lumpy. Pour the gravy through a mesh strainer and discard the lumps. Alternatively, portion the gravy into a blender in batches and puree until smooth. But when working with hot liquids, never fill a blender more than a third full.

The mashed potatoes are lumpy. Leave them be and call them “rustic” or “smashed” potatoes. Continuing to mash the potatoes will risk overworking them and can make them gluey. (See the dire warning about gluey potatoes below.)

The green vegetables are overcooked. Pop the vegetables into the food processor and pulse until they are finely chopped. Now mix them into the mashed potatoes, rebranding the dish as “Brussels sprouts potato mash.” And by the way, that example is particularly delicious if you happened to toss some bacon in with the overcooked Brussels sprouts.

Or, if the meal could use a first course, turn the veggies into a soup. In a blender, combine the overcooked vegetables with some milk, broth or water, a little garlic and some cheese, then pureeing until smooth. You also could stir in a spoonful or two of mashed potatoes for thickening, then garnish the soup with toasted seeds or nuts. You’re a genius.

The pie falls apart or the crust crumbles. Spoon it into wine glasses in alternating layers with a bit of ice cream or whipped cream and call it a pie trifle.

The whipped cream is over-whipped. If the whipped cream starts to look dry and grainy, just add a little more cream and carefully beat it until soft peaks form. Then stop. You’re done.

Alternatively, assuming you have enough heavy cream to make a second batch, keep beating the first batch until the cream completely breaks and forms butter (and liquid, the buttermilk). Drain off the buttermilk (save it for pancakes the next morning) and season the butter with salt. Serve it with the dinner rolls. It will be the best butter you’ve ever eaten.

The cake is dry.  Make a simple syrup by combining equal parts sugar and water and heating them in a saucepan over low heat until the sugar is dissolved. If you want to flavor the syrup, add vanilla, lemon zest or juice, orange zest or juice, brandy or another liqueur. Brush the syrup liberally over the layers of the cake before assembling. Or slice the cake and drizzle the syrup over each serving.

Or you can make a quick raspberry or strawberry sauce by combining some frozen (thawed) berries with a little sugar in a blender. Puree it all, then strain the puree to remove the seeds. Pour the sauce over the cake slices, top each portion with ice cream and call it cake a la mode.

The cake/cheesecake/pumpkin pie is cracked. You can camouflage the cracks by decorating the top of the dessert with lightly sweetened whipped cream (preferably piped on using a decorative tip) or by dusting it with powdered sugar shaken from a mesh strainer. And if you want to get fancy, pick up a paper doily ahead of time. Place the doily over the cake and dust with powdered sugar over that. Beautiful! Either quick fix should be done at the last minute because the whipped cream eventually can get watery and the powdered sugar will weep if it sits for too long on top of the cake.

The rolls are burned on the bottom. Perform a taste test. Using a serrated knife, slice the bottom off one of the rolls, then taste what’s left. If it tastes burned, toss them. If it tastes fine, slice the bottoms off all of the rolls, arrange them in a single layer in a basket, bottoms up, and spread softened butter on the cut sides. Serve them hot and call them hot buttered rolls.

The unfixable two

There are really only two kitchen errors that can’t be easily repaired. If something is burned — and I don’t mean just singed or browned on the bottom — it’s going to taste bad pretty much no matter what you do to it. You could try telling your guests that you smoked it, but the chances are they’ll know the terrible truth. Your only real choice is to toss it out and serve more of the dishes that weren’t burned. Or order out for pizza.

That said, a slightly burned turkey sometimes can be saved. If it’s mostly the skin that took the heat, carve the bird (in the kitchen!), discard the skin, then use the broth technique described above to bring back some moisture. But if the meat itself is burned… Well, everyone loves the sides most, anyway.

The second mistake that can’t be undone — overmixed, gluey mashed potatoes. I made this mistake many years ago and I’ve never forgotten it. It was Thanksgiving and I’d just begun attending cooking school. I volunteered to cook the whole big meal myself at my sister’s house. She didn’t own a potato ricer, food mill or even a plain old potato masher. So when it was time to puree my potatoes, I reached for the food processor… and ended up with wallpaper glue.

If this happens to you, please understand that the potatoes are dead and you’ll need to cook up something else to absorb the gravy. If you have enough potatoes, just cook up another batch. And if time is running tight, cut the potatoes in 1/2-inch pieces before boiling them; they’ll be done much faster. Alternatively, grab a box of pasta (preferably orzo or macaroni), boil it up, toss it with butter and Parmesan and brightly inform your guests that you just felt like going Italian this holiday.

Seven Ways to Build a Gingerbread House

Make a Gingerbread House from a Mold

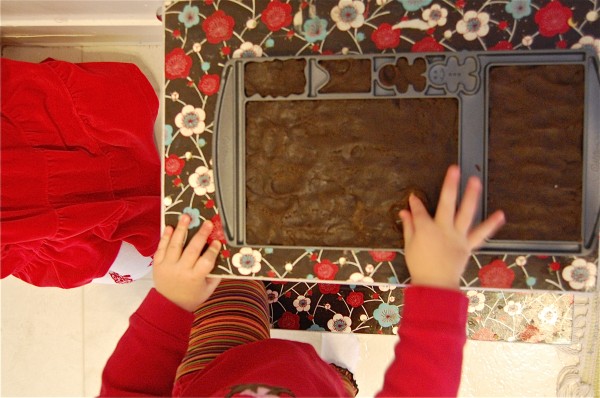
Find a mold like this. While most of the work is done for you, you can still say it’s 100% homemade!

GH1


Graham Cracker Gingerbread House on a Milk Carton

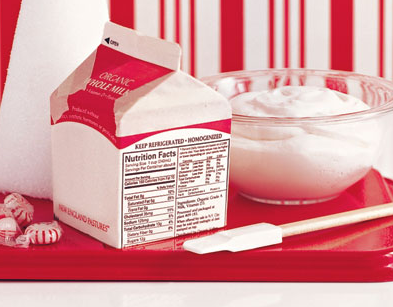
This is the recipe my friend made for our toddler play date last year, and it was perfect for little ones. I know my friend had a hard time collecting milk cartons for all the children in our group, but once you gather the milk cartons, they’re easy to assemble. From Martha Stewart.

GH2


Make a Gingerbread House from Scratch

Mama Smiles shows us how she made her house with a toddler (no small feat!) from scratch!


GH3


Make a Graham Cracker Gingerbread House

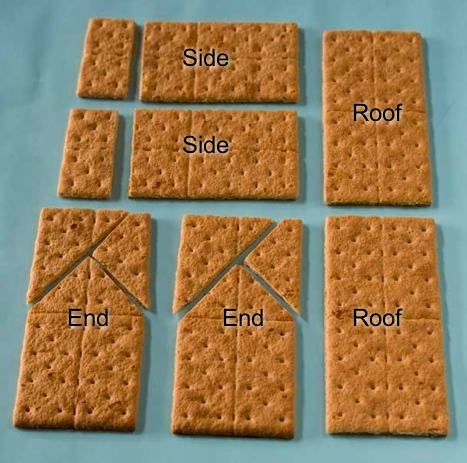
Kelley Moore shows us how to make a beautiful graham cracker gingerbread house.


GH4


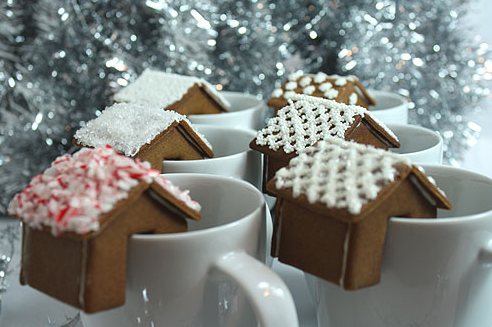
Tiny Gingerbread House Perched on the Rim of a Mug

Oh my goodness! These are most definitely not for making with little kids, but what a show stopper!


GH5


Gingerbread House from a Kit

Or, take the easier route with a store-bought kit. A Spoonful of Sugar Designs shares their Ikea kit. Lovely. These kits are easy to find in many stores during the holiday season. In case you want the ease of shopping online, this gingerbread house kit is the #1 Best Seller on Amazon (affiliate).


GH6


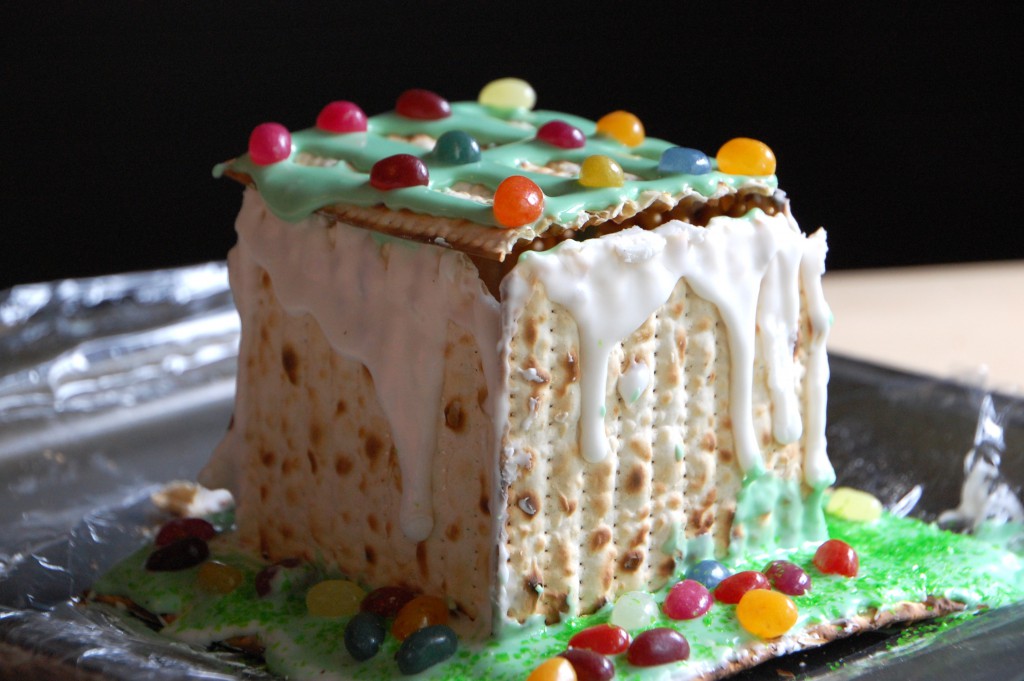
Gingerbread Matzo House

Not exactly gingerbread, but we made these jelly bean matzo houses earlier this year and I couldn’t resist sharing, just to show that with some icing and candy, you can turn just about anything into a house.


GH7


10 Things We Love About Julia Child’s French Kitchen

kitchen-1

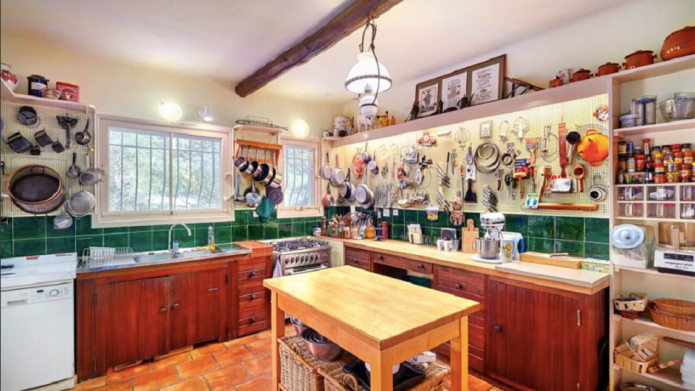
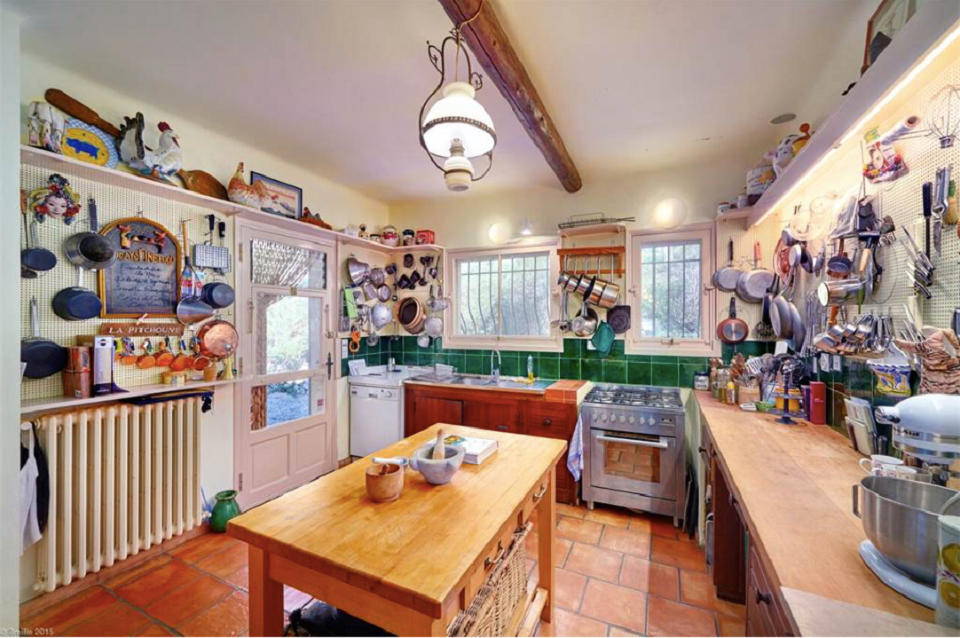
The charming French cottage where Julia Child and her beloved husband vacationed for many years has just hit the market, and naturally the main attraction is the kitchen where the iconic chef honed her skills.

She called the home “La Pitchoune,” which translates to English to “the little one,” and nicknamed it “La Peetch” for short. This is the first time the home has been offered on the open market, and boy, do we wish we could afford the undisclosed price tag.

Here are a few choice aspects of Julia Child’s kitchen that we love.

kitchen_2

1. The dreamy location

The small stucco cottage is located in the south of France and sits on a hillside close to the town of Grasse, about a half-hour drive from Cannes.

2. The custom fit

The entire kitchen was custom built by her husband, Paul, just for her. For instance, the counters sit higher in the “La Peetch” kitchen to fit Julia’s tall 6-foot-2-inch frame.

3. The guest lists

Apparently Julia and Paul entertained the cream of the cuisine crop at “La Peetch,” including James Beard and M.F.K. Fisher.

4. The pegboards

The walls are still lined with pegboards Paul lovingly installed for Julia to hang her cooking tools. To keep things organized, Paul and his twin bother, Charlie, painted outlines of each individual piece of equipment on the boards, which have been preserved and are still there today.

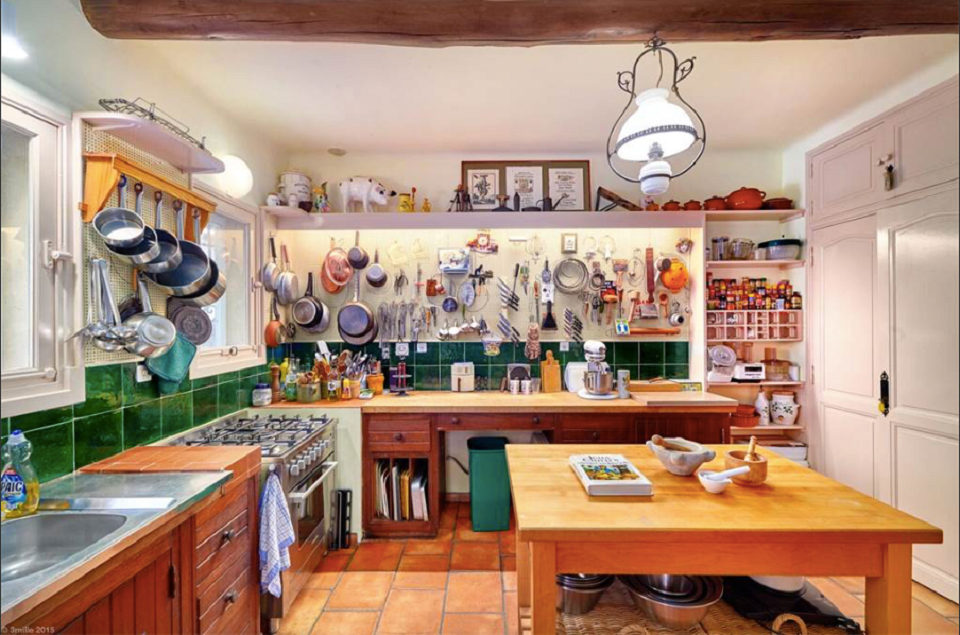
5. The oven

The gas range once used by Julia herself would be a treat to cook on. Not to mention all the delicious tastes you could whip up on that big old six-burner gas stove.

kitchen_3

6. The storage

Julia was able to really pack quite a bit of equipment into her little French country kitchen. From the built-in spice rack to the slots made for holding cookbooks, everything was obviously carefully considered and given a place.

7. The lighting

Not only do we love the light fixture, but the sun bathes the kitchen in light during the day.

8. The price tag

Julia and Paul built the cottage on the property of her bestie, Simone Beck, who was also her co-author for her bestseller Mastering the Art of French Cooking. Simca, as Julia affectionately called her, reportedly gave them the property in a casual handshake deal with one condition: The Childs would return the house to Simca once they could no longer use it. They visited yearly for 30 years — from the ’60s through the ’90s — until Paul’s health would no longer allow him to travel in 1992. They then returned the home to Simca.

9. The green tile

The green tile backsplash gives this predominately utilitarian space a pop of eye-catching emerald green. Those tiles are probably antiques you couldn’t find anywhere else.

9. It’s food history

After the Childs returned the cottage to Simca, it was turned into a a cooking school, which is closing because Kathie Alex, the American who ran the school, had to retire due to failing health.


6 Top Tips For Choosing The Perfect Kitchen Tiles

pic1

Tiling your kitchen can be a bit daunting – especially if you want to inject some character but don’t want to put off potential future buyers.

If you’re in the throes of fitting or designing a new kitchen, the chances are you’ve probably forked out a fortune on cupboards, appliances and a stylish sink. So it’s tempting to try to cut back on features such as tiles.

But they’ll actually be the key to your new kitchen’s whole look and feel.

Kitchen wall tiles not only look clean and cool but they’re practical, too – creating the perfect splash-back for your sink and hob.

And opting for quality kitchen floor tiles – from the simplest metro designs to intricate Moroccan patterns – can really add that wow factor to your cooking and entertaining space.


1. Should I go for a patterned tile? And if so, how do I choose one?

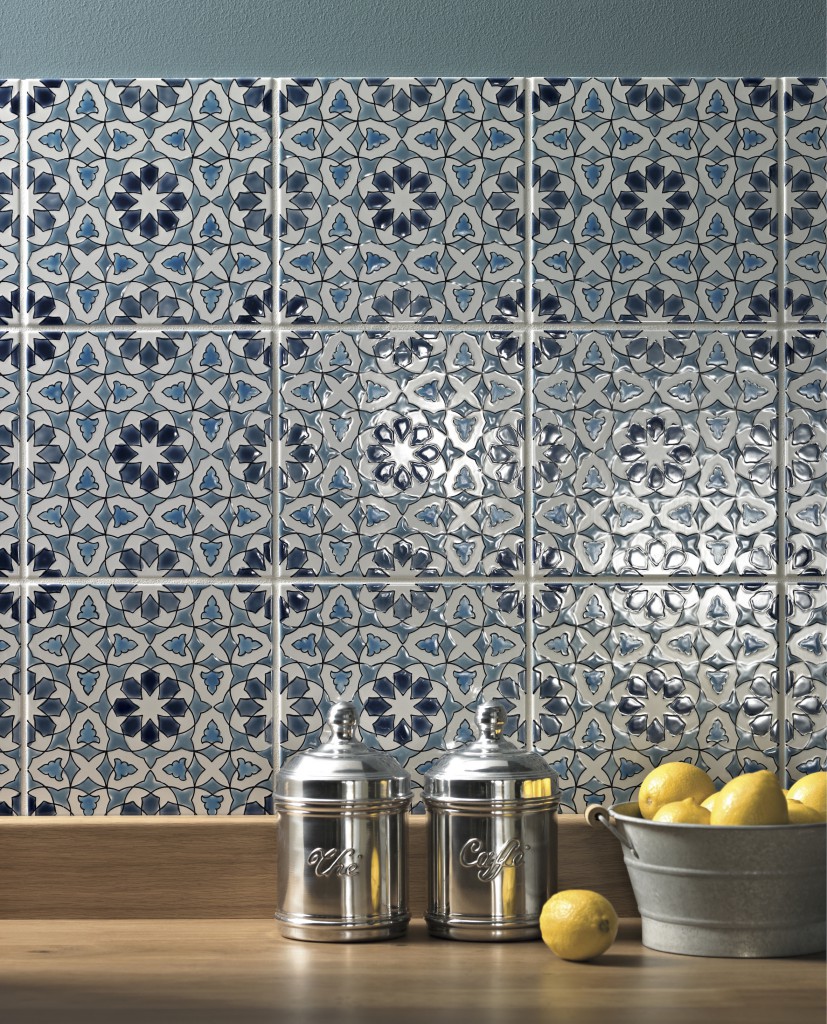
Moroccan and Moorish designs have a timeless appeal so they’re equally at home in contemporary and more traditional kitchens, making them a fail-safe buy.

pic2


2. How do I choose a colour for my kitchen tiles?

It’s difficult to go wrong with blue and white patterns, since they’re such a classic combination – and they have a particularly fresh feel that’s perfect for kitchens.


pic3


3. Where do I start with shaped kitchen tiles?

If you’re slightly unsure about opting for patterned tiles, then shaped tiles – for example, hexagonal or Arabesque designs – are a really good compromise, since you can use them to create beautifully subtle, easy-to-live-with patterns.

Another option is to create a decorative effect by using metro-style tiles in eye-catching designs such as a herringbone layout.


pic4


4. What are the most common mistakes people make when tiling a kitchen?

Always think about scale, since a little pattern can go a long way, particularly in a compact kitchen. Avoid designs that are too ‘busy’ since they’ll make the kitchen look smaller than it is.

Similarly, a combination of decorative walls and floors might have the effect of making a kitchen look somewhat crowded.


5. Can patterned floor and wall tiles put off potential buyers?

If you’re thinking of appealing to a wide range of buyers, it’s probably safer to opt for either a patterned wall OR a patterned floor.

You could then always use a border of the tiles to echo the patterned wall (or floor), giving the scheme a pulled-together yet balanced feel.


pic5

6. I’d love to use kitchen tiles with a bold pattern, but worry that they might not appeal to buyers.

If you’ve fallen in love with some really vibrant, ornate tiles that you suspect might not be for everyone, you could always use them to create a splashback, rather than tiling the entire kitchen.

That way, you’ll be able to enjoy the tiles, and potential buyers won’t feel daunted by them – since they’ll be relatively quick and inexpensive to replace.

5 Bogus Kitchen Tips That Experts Say To Stop Believing

Sharpen your kitchen knowledge and throw away these old cooking myths!

Cooking

While learning tried and tested cooking techniques is necessary to gain kitchen skills, some tips passed on from generations are outdated and no longer hold true. Find out what these are below:


MYTH: Sear the meat so that moisture is sealed in.

Many chefs recommend searing meat to keep its juice intact so steaks come out moist and flavorful. However, based on an experiment done by food scientist Harold McGee and Food Network chef Alton Brown, searing meat actually takes the moisture out, according to Cook Think. When done wrong, the meat ends up tougher and harder to chew, so it’s best to no longer follow this cooking tip.


MYTH: Alcohol evaporates during cooking, so you can’t actually get drunk.

The belief is that foods that contain ingredients like vodka, red wine, or rum, should be stripped of its alcohol content during the cooking process. Not quite. It’s all depends on how the food was cooked. In reality, over 85 percent of alcohol remains in the food after cooking, according to Ochef.


MYTH: Microwaving food takes away its nutrients.

The truth is: cooking food in microwave is no different than doing so on a stove top. Microwave cooking actually does the opposite and preserve vitamins and minerals found in food, according to CNN. This is because it involves shorter cooking time and less heat, which causes less damage when breaking down the nutrients.

“The best cooking method for retaining nutrients is one that cooks quickly, exposes food to heat for the smallest amount of time and uses only a minimal amount of liquid,” said food scientist Catherine Adams Hutt in the CNN report.


MYTH: Cool food before putting it in the fridge.

There’s a valid point for doing this, but it’s more because food that’s piping hot can make the fridge work double time, and not because the change in temperature can spoil the food a lot quicker. However, food shouldn’t be left at room temperature longer than two hours because microorganisms can build up and spoil it, according to ServSafe, the guidelines followed by the National Restaurant Association. To quickly let food cool down, it’s best to divide contents into smaller containers.


MYTH: Add oil in pasta and then rinse in cold water after it’s cooked.

Oil supposedly keeps the noodles from clumping together, while the cold water supposedly stops the cooking process so that the pasta doesn’t become soggy. But oil does not prevent clumping – rather the occasional stirring of the pasta in boiling water does – according to Ask Men. Rinsing pasta in cold water after boiling also does nothing but keep the sauce from adhering to the pasta better, according to Lifehack.


New Kitchen Trends: Blurring The Lines Yet Seeing More Clearly

Google ChromeScreenSnapz023


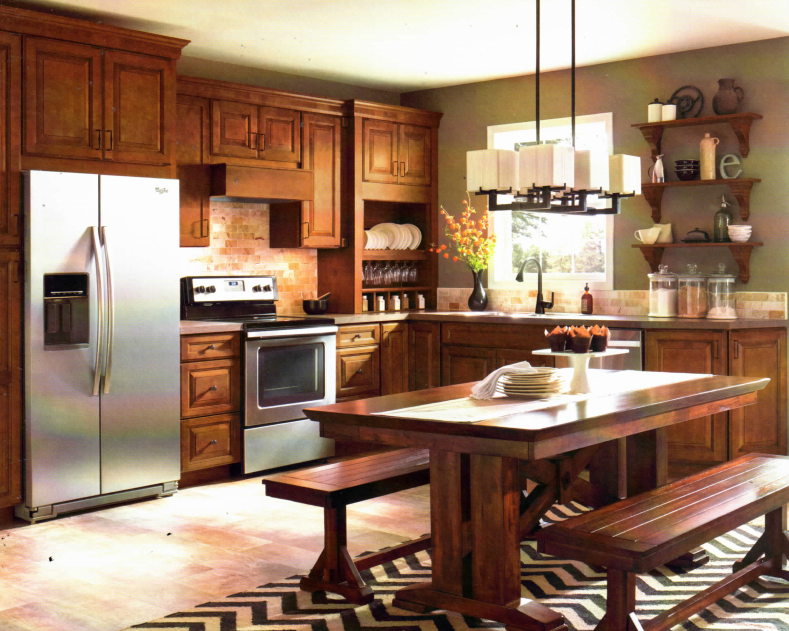
“In recent years the trend of open floor plans has been on the rise, and with it comes some innovative ideas to make the whole home work together.

The kitchen is borrowing style from the nearby living areas and is becoming less of a focal point as blurring the lines between rooms becomes necessary.

With these rooms vanishing into each other, we start to see elements from the living/entertaining area merging into the kitchen, such as open shelving and more functional drawer storage.”

Katie Kuiper
Design Studio Senior Designer
MasterBrand Cabinets, Inc., parent company of
Aristokraft® Cabinetry


3 New Kitchen Trends To Consider:


open shelving »
Open shelving is becoming more of a staple in the kitchen. Not only does it make items easier to access, it also puts them on display.


drawers »
Drawers are increasing in the kitchen. Not only are we seeing standard base cabinets being swapped for easier-to-access drawer bases, but also with the open shelving trend, the drawer is needed to take on more functions.


transitional styling »
In blurring the lines between rooms, a new style has emerged, making it the perfect mix of warmth, comfort, clean lines, and understated colors to go with the rest of your home’s décor. Transitional sits right in between Traditional and Contemporary, is timeless and effortless.